
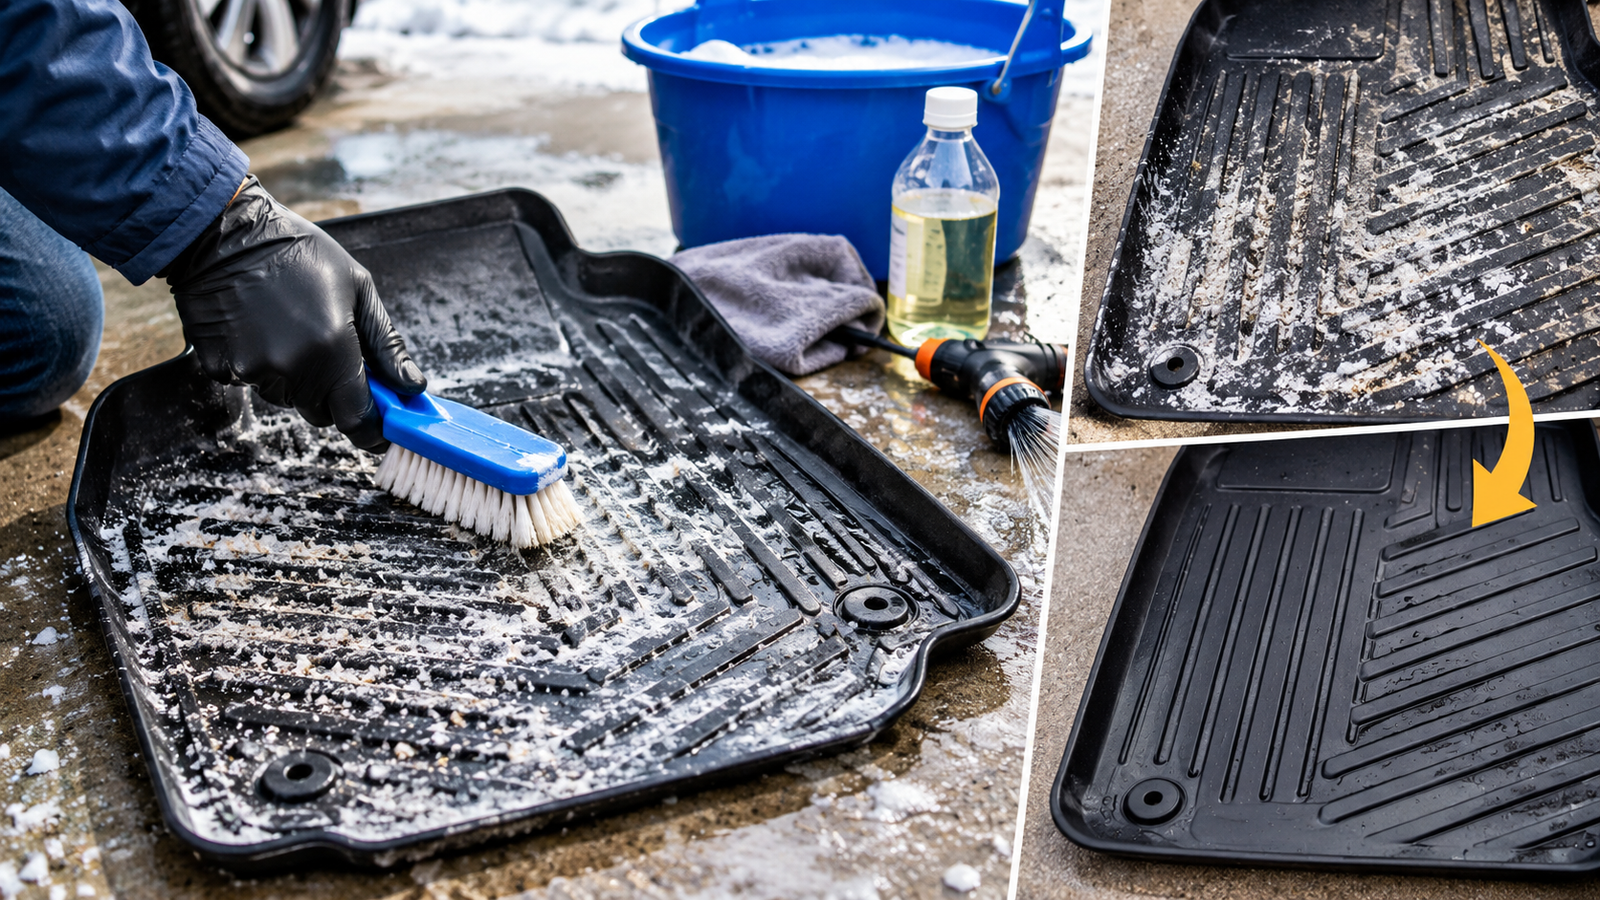
You pulled your rubber mats out after the first salted week of winter, and they’re crusted white, with chalky lines packed into every groove. The crust comes off. Most of it needs only a brush, warm soapy water, and a full dry, and the six steps below also cover the hazy film that keeps coming back.
Quick Answer: To remove road salt from rubber car mats in six steps, shake out loose crystals, rinse, then scrub with warm water, mild dish soap, and a soft brush, working into the grooves. Rinse until no suds remain. Treat any white haze with a diluted vinegar wipe after a spot test, then dry completely.
Table of Contents
What You Need to Know
- Clear the dry salt first. Wetting loose crystals turns them into brine that spreads through the texture of the mat.
- The grooves are the problem, not the flat surface. A narrow brush does more than extra scrubbing with a wide one.
- The white haze may not be salt. A plain-water rinse test (Step 4) indicates whether you need to use vinegar.
- Dry the mats fully, then reinstall them secured. A damp or loose driver’s-side mat is the one mistake with a safety cost.
- Rubber mats clean easily; the carpet underneath does not. That is the reason to keep salty water on the mat and out of the footwell.
How do you remove road salt from rubber car mats?
You remove road salt from rubber car mats by clearing the dry crystals, washing with warm soapy water and a brush, rinsing clean, and drying the mat completely. Wash only after you have brushed off the dry salt. Here is the short version, with the details in the sections that follow:
- Take the mats out and shake or brush off loose salt dry (about 1 minute per mat).
- Rinse with a low-pressure hose (1–2 minutes per mat).
- Soak in warm soapy water and scrub the grooves (2–3 minutes of soaking, then brushing).
- Treat leftover white haze with a plain-water test, then a spot-tested vinegar wipe if needed.
- Rinse until the water runs clear and the surface no longer feels slick.
- Dry fully, then reinstall and secure the mats.
What do you need to clean salt off rubber mats?
You need five basic things, and you probably own all of them. A narrow brush is the item most people skip, and it matters most.
- A stiff dry brush or handheld broom for the first pass
- A soft or medium brush for the surface
- A narrow detail brush or old toothbrush for channels and raised edges
- Mild dish soap and a bucket of warm water
- Microfiber towels, plus white vinegar if you need it for haze
Step by step: how to remove dried road salt from rubber mats
Dried salt consists of crystals and a film that remains after salty slush evaporates. Rubber, TPE, and other all-weather mats are the easy case, because the salt sits on the surface and in the texture instead of soaking into the fibers.
Step 1: Take the mats out and clear the loose salt dry.
Remove the mats from the car before you add any water. Then the footwell carpet underneath stays dry, and you can see what you are dealing with.
Shake each mat hard, then go over it with a dry brush for about a minute, following the grooves. Expect a surprising amount of white powder to fall out. That is salt you will not have to dissolve.
Step 2: Rinse with a low-pressure hose
Rinse each mat for one to two minutes, starting at the end the slush ran toward. Use cool or warm water. Guides disagree on whether hot water causes real trouble, so the safe choice is to skip it.
A garden hose is enough. Leave the pressure washer in the garage unless your mat maker’s instructions say it is fine.
Step 3: Wash and scrub the grooves.
Soak the mat in warm water with a little mild dish soap for two to three minutes, then scrub. As a starting point, use a teaspoon or two of dish soap in a bucket of about two gallons.
Work the soft or medium brush across the surface. Switch to the narrow brush for the channels and raised edges, where salt collects and stays. For general care beyond salt, see our guide to cleaning TPE floor mats.
Step 4: Treat leftover white haze.
Do a plain-water test before you reach for vinegar. Rinse the mat with clean water, let it dry, and look again. If the haze disappears while wet and returns when dry, it is salt. If it does not dissolve in water, it is probably soap, hard-water minerals, or product residue, and more vinegar will not help.
For salt haze, a mild mix is a reasonable next step. A widely cited home recipe for car mats is 1 teaspoon of white vinegar, 1 teaspoon of mild dish detergent, and 1 pint of warm water. Spot-test a hidden corner first and let it dry before you treat the whole mat.
Wipe for a minute or two, then rinse thoroughly. If the mild mix does not clear it, do not strengthen it. Check your mat maker’s care instructions instead.
Step 5: Rinse until the water runs clear
Rinse for another minute or two until no suds remain and the surface no longer feels slick. Soap residue attracts dirt and can leave rubber slippery, which defeats the point of a non-slip mat.
Run your palm across the surface. It should feel grippy, not slick.
Step 6: Dry fully, then reinstall and secure.
Dry the mats completely before they go back in the car. Towel them off, then stand them on edge in a ventilated spot. Check the grooves and the underside with a dry towel. A wet mat in a closed car holds moisture against the carpet beneath it.
Then reinstall with care. A General Motors service bulletin filed with NHTSA warns that a mat of the wrong size or one not properly installed can interfere with the accelerator or brake pedal. It also says not to flip the driver’s mat over to keep it clean and not to place anything on top of it.
Clip or anchor the driver’s-side mat into its retention points, then press each pedal through its full travel to confirm nothing catches. Our guide to installing car floor mats correctly walks through it.
Salt-crust triage: what is that white stuff, and what do you do?
Rinse with plain water and let the mat dry: if the white film vanishes when wet and returns when dry, it is salt. Use this chart to match what you see to the next move.
| White powder or crystals in the grooves, dry | Dried salt crystals | Dry-brush and shake, then rinse | Soapy-water wash |
| Crust remains after rinsing | Salt packed into the texture | Soak in warm soapy water, work grooves with a narrow brush | Repeat the soak once |
| Hazy film after drying | Salt film or soap residue | Rinse with plain water and dry again | Diluted vinegar wipe after a spot test |
| Film will not dissolve in water | Probably not salt: soap, hard water or product residue | Re-wash and rinse thoroughly | Check your mat maker’s care instructions |
| Slick surface | Soap or dressing residue | Re-wash and rinse until grippy | Stop using slick products |
| What you see | Likely cause | First move | If it persists |
|---|---|---|---|
| Haze returns when the mat gets damp | Salt still in the texture | Dry fully, then re-treat the grooves | Consider whether the mat is worn out (see below) |
Save or screenshot this Salt-Crust Triage Chart. It covers what to do for each kind of white residue on rubber mats.
Why a haze can return even after a good wash
“Road salt” is not one chemical. A federal highway literature review prepared for the Idaho Transportation Department, FHWA-ID-14-231, covers sodium chloride, magnesium chloride, and calcium chloride and their corrosive effects on vehicles.
Calcium chloride and magnesium chloride are hygroscopic, meaning they pull moisture from the air. That may help explain why a leftover film can look damp again in humid weather. Treat this as an explanation, not a tested finding.
What can you use on rubber mats, and what should you avoid?
Mild dish soap and water are the safe default for rubber mats. Slick, silicone-based dressings are the one product to avoid completely.
| Product | Verdict | Note |
|---|---|---|
| Mild dish soap and warm water | Use | Standard for rubber and all-weather mats. Rinse until no suds remain |
| Diluted white vinegar | Use with a spot test | Commonly recommended for salt haze. We found no mat-maker confirmation for rubber or TPE |
| Dedicated salt neutralizer | Optional | Read the label for rubber or vinyl compatibility and follow it |
| Silicone or oily dressings | Avoid | Can make the mat slippery under your feet |
| Hot water | Skip to be safe | Guides disagree on how much it matters |
| Pressure washer | Check first | Use low pressure only, and follow your mat maker’s instructions |
Can you clean salt off rubber mats without a hose?
Yes, two buckets and a few towels will do the job. Use one bucket for soapy water and one for clean rinse water.
Dry-brush the mat first, scrub with the soapy water, then rinse by wiping with a towel dipped in the clean bucket. Repeat until no film remains. Towel-dry, then air-dry indoors, which also works when it is too cold outside to use a hose.
How often should you clean rubber mats in winter?
A quick shake-out once a week and a full wash every two to three weeks suits a daily driver on salted roads. Clean after any heavy salting, not just on a schedule. Two retailer guides land in this same range, but there is no tested standard, so treat it as a rule of thumb.
| Your driving | Quick shake-out | Full wash |
|---|---|---|
| Daily on salted roads | Weekly | Every 2–3 weeks or after heavy salting |
| A few trips a week | Every 1–2 weeks | About monthly |
| Occasional winter trips | After a salty trip | At the end of the season |
Common mistakes that bring the white crust back
Skipping the dry pass is the mistake that makes everything else harder. These five cause most repeat crusts and slick mats:
- Wetting loose salt before brushing it off. The dry crystals turn into brine that spreads into the grooves.
- Using only a wide brush. The salt that stays behind sits in narrow channels and raised edges.
- Leaving soap on the mat. Residue looks like a new haze and can feel slick.
- Finishing with a shine-dressing. It can make the surface slippery.
- Reinstalling damp or not securing the driver’s mat. Moisture stays trapped, and an unsecured mat can interfere with the pedals.
When cleaning is not enough: should you replace or upgrade your mats?
Replace the mats when cleaning no longer holds and the design keeps slush away from the carpet only poorly. If the mat’s edges do not contain meltwater, you will keep fighting salt every week.
Signs it is time: cracking or hardening, a mat that keeps shifting, gaps at the edges and around the pedals, or a haze that returns within days of a thorough clean. When you shop, look at fit for your exact vehicle, a raised perimeter that holds liquid, groove depth, and a secure retention system. Our roundup of the best all-weather car mats compares options on those points.
FAQs
How do I remove dried salt stains from rubber car mats?
Dried salt comes off rubber with warm soapy water and patience. Soak the mat for 2–3 minutes, scrub the grooves with a narrow brush, and rinse until the water runs clear. If a haze remains after drying, wipe it with a diluted white vinegar mix you have spot-tested, rinse again, and dry the mat completely before reinstalling it.
How do I remove road salt from rubber car mats without a hose?
Use two buckets: one with warm water and a little mild dish soap, one with clean warm water for rinsing. Dry-brush the mat first, scrub with the soapy water, then rinse by wiping with a towel dipped in the clean bucket. Repeat until no suds or film remain, then towel-dry and air-dry indoors.
Can I use vinegar on rubber car mats?
Diluted white vinegar is commonly recommended for salt haze, but we found no mat-maker confirmation for rubber or TPE in the sources we reviewed. Spot-test a hidden corner, let it dry, and keep contact to a minute or two before rinsing. If your mat maker’s care page says not to use it, follow that instead.
Is dish soap safe on rubber car mats?
Mild dish soap diluted in warm water is the most widely recommended cleaner for rubber and all-weather mats, and at least one major mat maker’s instructions name mild detergent and water. The catch is residue. Soap left behind can feel slick and attract dirt, so rinse until no suds remain and the surface feels grippy.
Why does the white film come back after I wash my mats?
Usually one of three things: salt still sitting in the grooves, soap residue, or a film that is not salt at all. Run the plain-water test: rinse, dry, and see whether the haze vanishes when wet. If it does, re-treat the grooves with a narrow brush. If not, rewash and rinse more thoroughly.
Does road salt damage rubber car mats?
The sources we reviewed focus on salt damage to carpet and metal parts, and we found nothing showing that salt itself degrades rubber or TPE. The more documented risks come from slick dressings and trapped moisture. Some guides also advise drying rubber mats in the shade. Keeping salty water on the mat protects the carpet beneath it.
Are tire shine or mat protectant sprays safe on rubber mats?
Avoid silicone-based or oily dressings on any mat. They can make the surface slippery, which matters most under the driver’s feet. Retailer and manufacturer care guidance both warn against slick treatments. If you want a protectant, use only a product made for automotive floor mats, and test your shoe’s grip before you drive.
What to do next
Once the mats are clean, put them back correctly: our guide to installing car floor mats correctly covers retention points and pedal clearance. If yours keep losing the salt fight, compare the best all-weather car mats for winter use. Prefer straight rubber? See the best rubber floor mats for cars.
Last updated October 29, 2026. This guide is compiled from published manufacturer and government documents and detailing guidance. It is not based on our own hands-on testing, so spot-test any cleaner and follow your mat maker’s instructions.
Sources