Your new seat cover just showed up, and now you’re standing in the driveway looking at a folded bundle of fabric, elastic straps, and hooks with no idea where to start. This guide applies to any seat cover, not one specific brand — if you buy through a link on this page, CarSeatPanel may earn a small commission at no extra cost to you. Most seat covers go on in well under an hour with no tools required, and this guide walks through every step in order, including the one part almost every other guide skips: checking whether your seat has a side airbag before you install anything.
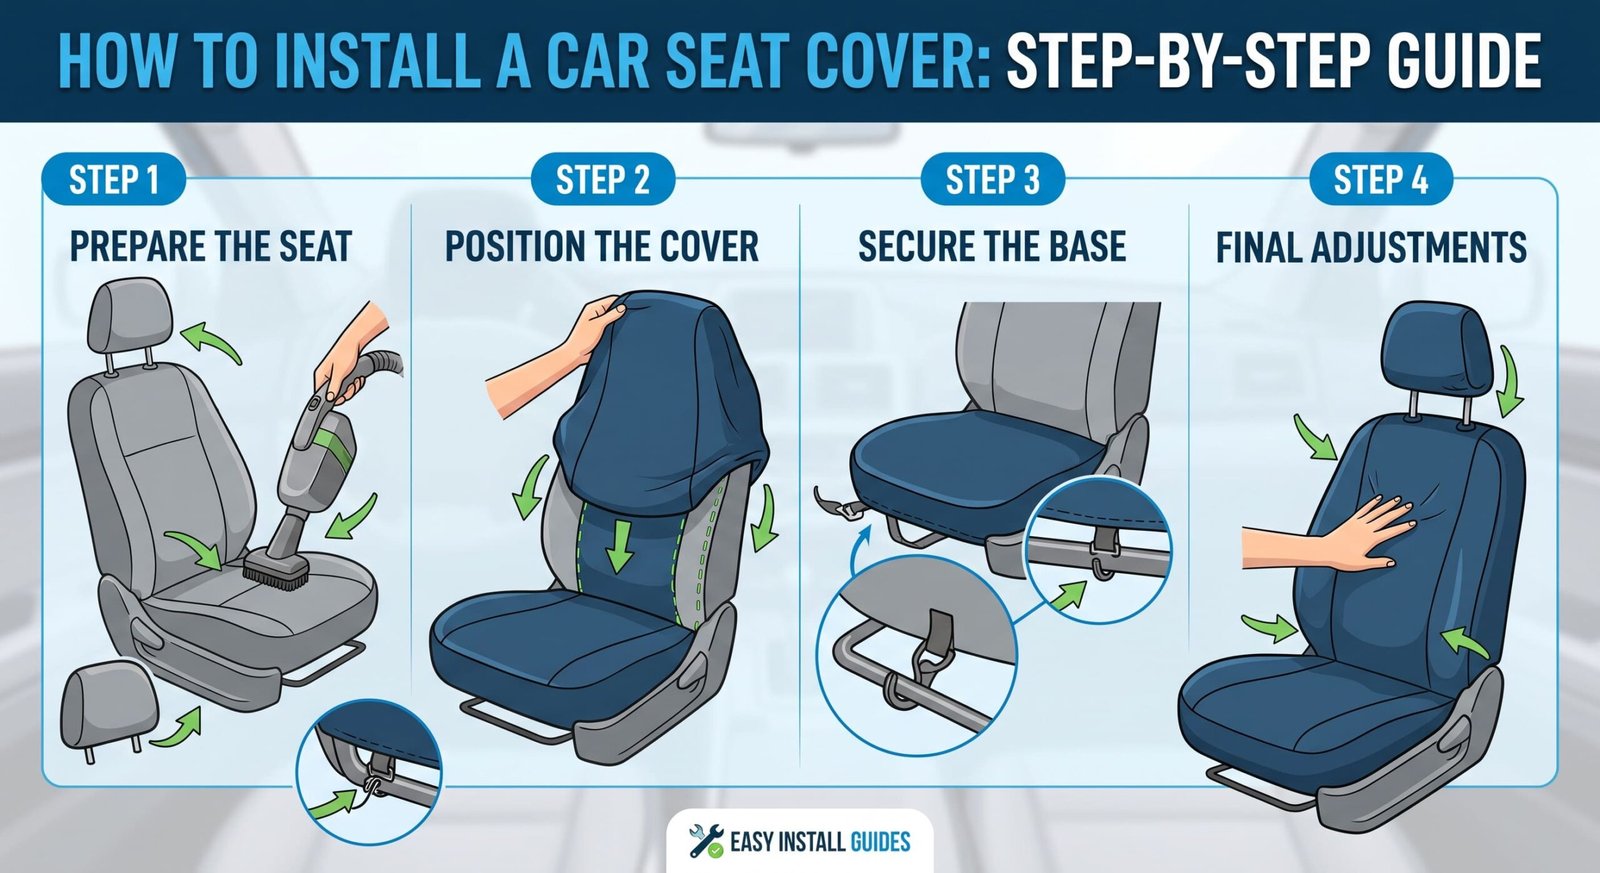
Quick Answer: Installing a car seat cover takes 15 to 30 minutes per seat and needs no tools for most universal or custom-fit sets. Remove the headrest, fit the backrest cover, tuck and strap the base cover, then reattach the headrest. If your seat has a visible “SRS AIRBAG” label, confirm your cover is specifically labelled airbag-compatible before installing it.
What You Need to Know
- Most installs take 15–30 minutes per seat and require zero tools.
- A seat with a visible “SRS AIRBAG” or “SIDE AIRBAG” label needs a cover labelled “airbag-compatible”—no single U.S. government standard enforces this, so the check is on you.
- Headrests come off first, every time. Skipping this step is the most common cause of a bunched, uneven fit.
- Front seats install in a fixed order: backrest cover, then base cover, then the headrest goes back on.
- Rear split-bench seats (60/40) install as two separate sections, not one piece.
What is the typical time required to install a car seat cover?
A single front seat takes 15 to 30 minutes on your first attempt, and the second seat usually goes faster because you already know the process. The material matters as much as your experience level: neoprene resists water well but gets stiff and harder to stretch in cold weather, while leatherette and polyester mesh slide into place more easily. A full front-and-rear set typically runs somewhere between 45 minutes and just over an hour, depending on the cover type and how many pieces the set includes. Custom-fit covers, cut for your exact seat, usually go on faster than universal covers because there’s less excess fabric to tuck.
Does Your Seat Have a Side Airbag? Check This First
Look at the outer edge of your seatback, near the door. If you see a tag or stitched label reading “SRS AIRBAG” or “SIDE AIRBAG”, your seat has an airbag built into the seatback itself — not just the dashboard or door panel — and that changes which cover you’re allowed to use.
This is the step most installation guides skip entirely, and it’s the one that actually is relevant for safety. Seat-mounted side airbags are common in vehicles built from the early 2010s onward. They deploy outward through a breakaway seam in the seat cover — but only if the cover is designed with one in the right place.
Here’s the part almost nobody explains clearly: there is no single U.S. government standard that certifies a seat cover as “airbag safe”. The relevant benchmark is SAE J1892, published by SAE International, an engineering standards organisation—not a federal regulator. SAE J1892 defines a test method for evaluating whether a seat cover interferes with airbag deployment, but testing against it is voluntary. A manufacturer can choose to test its covers or not, and a label that says “airbag compatible” is a claim based on that voluntary test, not a legal requirement enforced by NHTSA or any other agency. That puts the verification responsibility on you, the buyer, not on a government checkmark.
Seat Airbag & Cover Compatibility Check
Does your seat have an “SRS AIRBAG” label? Is your cover labelled ‘airbag-compatible’? What to do: No, not applicable. Install as normal — no special seam needed. Yes, yes, install with the compatible seam or tag facing the door. Yes, no, do not install — return or exchange for an airbag-compatible cover. Not sure, not applicable Check your owner’s manual or contact the vehicle manufacturer before installing.
Save or screenshot this compatibility check — it covers the one step most installation guides skip entirely.
What Tools Do You Actually Need?
Most seat covers need no tools at all — the straps, hooks, and elastic in the box are designed to be tightened by hand.
Item Needed? What is it for? Seat cover set: yes. The cover itself Vacuum with crevice attachment recommended. Removing debris before installing damp cloth is recommended. Wiping seats down before installing Flat trim tool or dull butter knife Optional: pushing fabric into tight seat gaps Flashlight or phone light Optional: Seeing under the seat to find straps. Scissors rarely. Cutting headrest post openings if not pre-cut
How to Prepare Your Seats Before Installing Covers
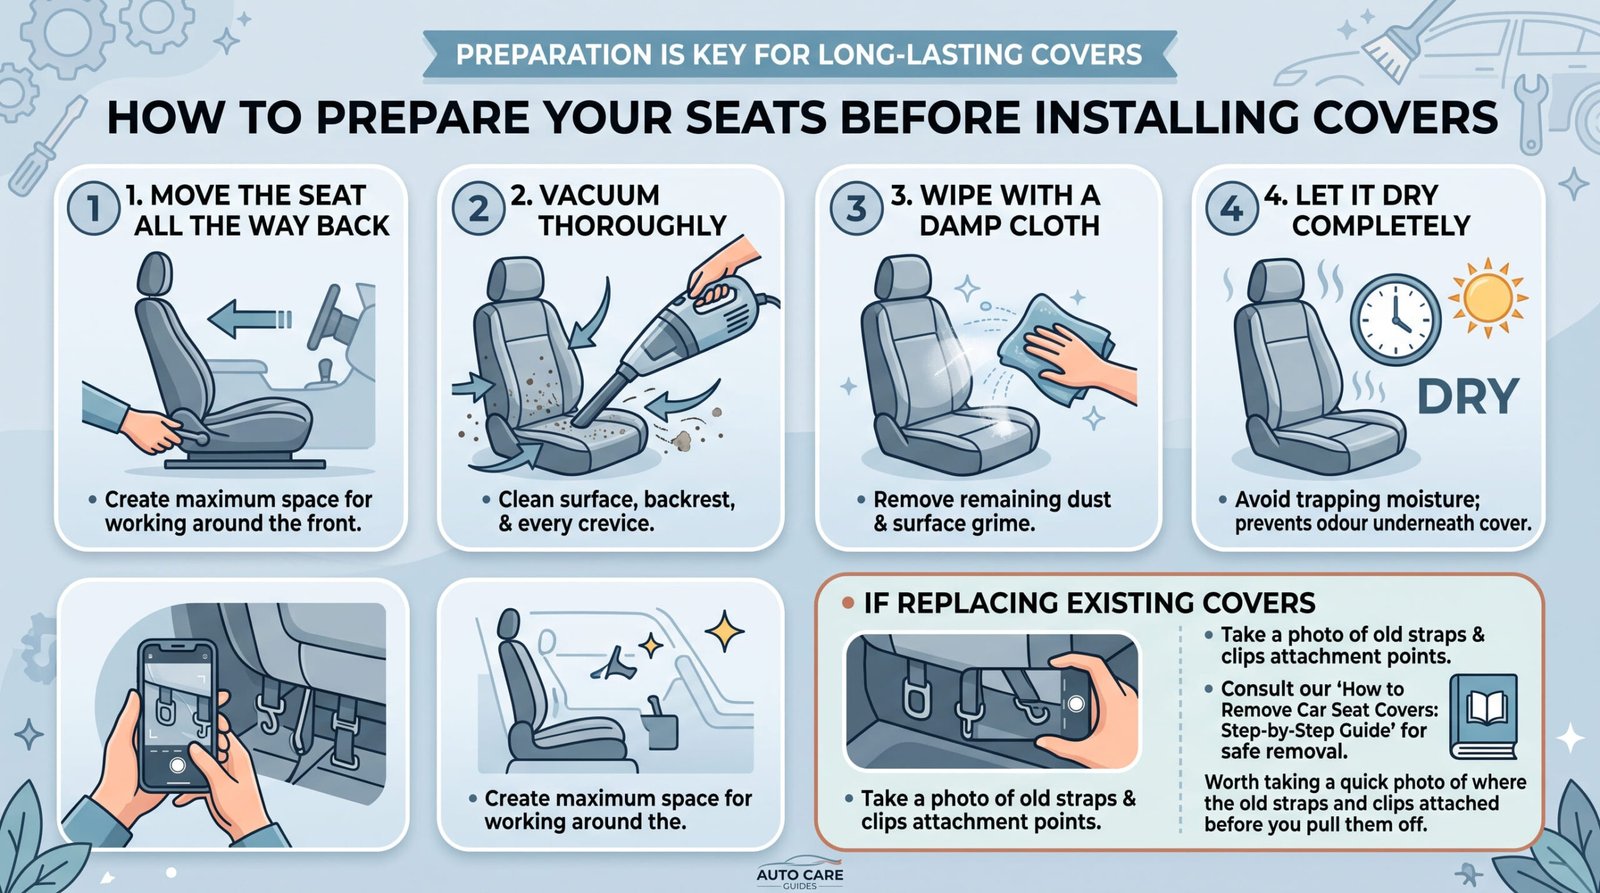
Move the seat all the way back to give yourself room to work around the front, then vacuum the seat surface, backrest, and every crevice. Wipe the seat down with a damp cloth and let it dry completely — installing over a damp seat traps moisture and can cause odour underneath the cover. If you’re replacing an existing cover, How to Remove Car Seat Covers: Step-by-Step Guide walks through removing the old one safely, and it’s worth taking a quick photo of where the old straps and clips attached before you pull them off.
How to Install Front Seat Covers (Step-by-Step)
Front seat covers install in a fixed six-step order: headrest off, backrest on, straps secured, base cover on, headrest back on, then a function test.
Step 1: Remove the headrest. Press the release tab at the base of each headrest post and pull straight up. Set it somewhere it won’t roll under a seat.
Step 2: Fit the backrest cover. Slide it down over the top of the seatback, matching the cover’s seams to the seat’s seams. If your seat has a side airbag, the compatible seam or tag goes on the side facing the door — not the centre console.
Step 3: Secure the backrest straps. Reach through the gap between the seatback and the seat base, pull the straps or hooks through, and fasten them tight. A loose strap here is the main reason for the cover shift after a few days of driving.
Step 4: Install the base cover. Lay it over the seat cushion, align the front edge, and tuck the rear edge into the gap between the cushion and the backrest — push it in 2 to 3 inches with a flat tool if you have one.
Step 5: Reattach the headrest. Line the posts up with the holes in the cover and push down until it clicks into place. If the cover has no pre-cut holes, mark and cut a small cross with scissors first.
Step 6: Test every seat function. Slide the seat forward and back, recline it, and buckle the seatbelt. If anything catches or won’t move, find the cause before you drive.
How to Install Rear and Split-Bench Seat Covers
Rear seats install the same way as front seats, with one difference: a 60/40 split bench needs each section installed on its own, not as a single piece.
Many rear bottom cushions unclip at the front edge — push down and lift, or push back and lift, to release the latch points. Pulling the cushion out entirely makes it much easier to reach the straps underneath. For a split bench, install the larger section first, then the smaller one; if your set has a zipper connecting the two sections, zip them together only after both are secured.
Special Cases: Heated Seats, Truck Benches, and Integrated Seatbelts
Heated or ventilated seats still work under a cover, but the material affects how much heat gets through. Thin materials like mesh or perforated leatherette transfer heat more effectively than thick neoprene or foam-backed fabric. Whatever you choose, keep every strap clear of the wiring harness running under the seat.
Truck bench seats with a 40/20/40 layout use a three-piece set. Install the outer driver and passenger sections first, then the centre console section last.
Integrated seatbelts appear on some Volvo, Subaru, and Land Rover models, where the seatbelt routes through the seatback instead of the door pillar. These seats need a cover with a matching pass-through slot — a standard cover won’t work safely here. Confirm compatibility with the manufacturer using your vehicle’s VIN before buying.
Common Installation Mistakes (and How to Fix Them)
Mistake: What happens? Fix. Skipping headrest removal Cover twists and won’t sit flat. Always remove headrests first. Not tucking deep enough Cover pulls loose within days. Tuck 2 to 3 inches into the seam gap. Loose straps cover shifts and wrinkles. Cinch tight, and re-tighten after a week of use. Straps routed over seat rails The seat won’t slide. Route every strap under the adjustment mechanism. Wrong airbag orientation The airbag seam ends up on the wrong side. The compatible tag or seam always faces the door. Installing over a dirty seat Trapped debris wears the cover and seat. Vacuum and wipe the seat down first
Universal vs. Custom-Fit Covers: Which One Installs Easier?
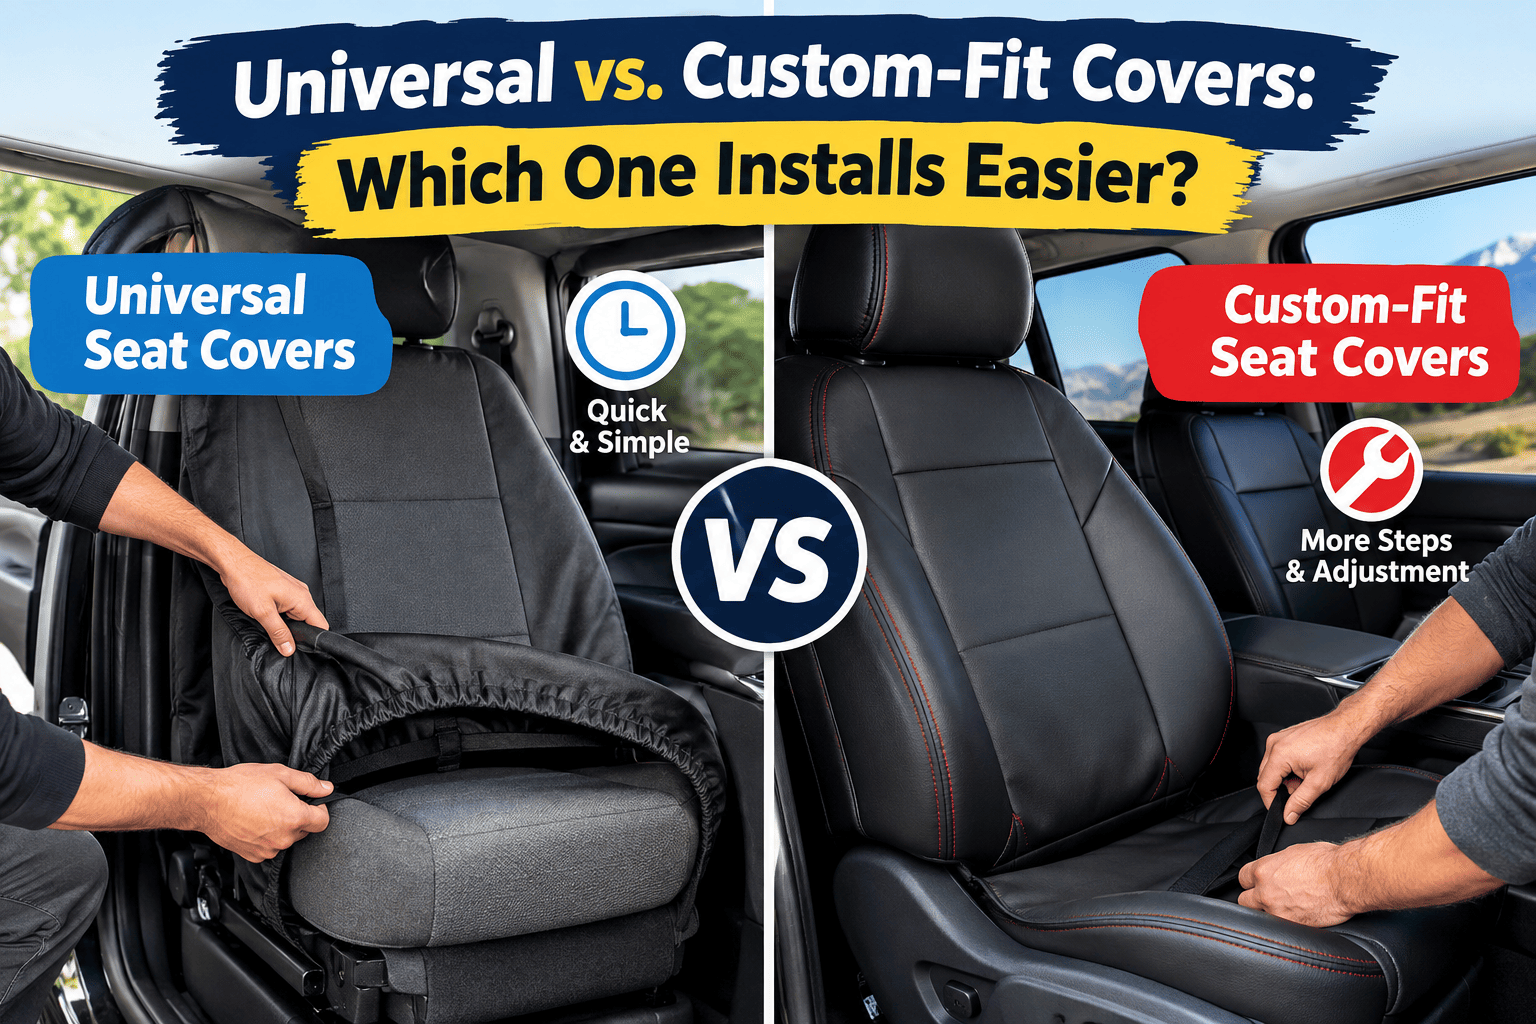
A custom-fit cover, cut to your seat’s exact dimensions, generally installs faster and stays in place longer than a universal-fit cover, which relies on stretch and generic strap points to cover a wider range of seat shapes. Universal covers cost less and ship faster, but expect more excess fabric to tuck and adjust. Custom-fit covers take a few extra minutes to source for your exact make and model, but they align with your seat’s seams, headrest posts, and airbag zones without any guesswork.
If you’d rather skip the extra tucking altogether, Easy-Fit Car Seat Cover Covers in the USA (2026 Guide) breaks down which universal options actually fit snugly without a wrestling match. If style matters as much as fit, Cute & Stylish Car Seat Covers in the USA (2026 Guide) rounds up options that look as good as they install.
FAQ
Do I need to remove my car seats to install seat covers?
No. Nearly every seat cover — universal, semi-custom, or custom-fit — installs while the seat stays bolted into the vehicle. You’ll slide the seat forward and back for access, but it never comes off its rails. The one exception is a full reupholstering job, which is a different process and typically needs a professional.
Will a seat cover interfere with my side airbags?
Only if you use one that isn’t rated for it. A seat with a visible “SRS AIRBAG” label has an airbag built into the seatback, and a cover without a matching breakaway seam can restrict how it deploys. Covers labelled ‘airbag-compatible’ are tested against SAE J1892, an industry test method rather than a federal requirement, so verifying compatibility falls on the buyer.
How long does installation actually take?
Plan on 15 to 30 minutes for a single front seat the first time you do it, with the second seat going faster once you know the process. A full front-and-rear set typically runs somewhere between 45 minutes and just over an hour, depending on the cover type and how many pieces the set includes.Plan on 15 to 30 minutes for a single front seat the first time you do it, with the second seat going faster once you know the process. A full front-and-rear set typically runs somewhere between 45 minutes and just over an hour, depending on the cover type and how many pieces the set includes.
Will installing seat covers void my car’s warranty?
Generally, no. Under the Magnuson-Moss Warranty Act, a manufacturer can’t void your entire vehicle warranty just because you installed an aftermarket accessory like a seat cover. The exception is if the cover itself is shown to have caused a specific problem — for example, a strap that damaged a seat motor — in which case that specific repair could be denied.
How do I stop my seat cover from slipping after installation?
Tight straps are the first fix — cinch every hook and elastic as far as it will go during installation, then go back and re-tighten everything after about a week, since new material stretches slightly with use. If the cover still shifts, a thin anti-slip mat between the cover and the factory seat adds extra grip.
What to Do Next
Once your covers are on and tested, a slightly damp cloth or a manufacturer-approved cleaner keeps them looking new — full instructions are in How to Remove Stains From a Car Seat Cover (Every Type). If you’re mid-swap and still need to get the old covers off first, start with How to Remove Car Seat Covers: Step-by-Step Guide. And if this whole process made you want a cover that skips most of the tucking and adjusting, Easy-Fit Car Seat Cover Covers in the USA (2026 Guide) is the place to start.